{disclosure: this post contains affiliate links}
A common question I hear from moms who are new to the whole Tot School idea is one concerning the amount of time invested.
“How long do you spend setting it all up?”
“How long do you spend planning?”
“How long does it take to clean up and what do you do with the work in the end?”
The short answer is…as long as you let it take!
The longer answer is below…
I invest a lot of time into our tot/preschool activities because I ENJOY IT! I have an early childhood degree and teaching young children is my passion. I enjoy just about every moment of the planning, prep, and even figuring out how best to organize/store it all when we are done. Because it is something I truly enjoy, it doesn’t seem like work to me, so I have no clue how long it actually takes me! I know not all of you enjoy it all and you do it as an act of love for your youngsters. I will do my best to outline what typical planning, preparing, and organizing looks like for me.
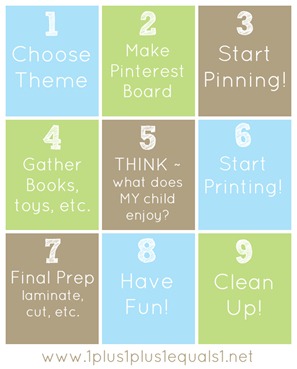
Step One ~ Choose a theme {or letter of the week} You do NOT have to have a theme, especially with the younger tots, but it often makes planning more fun. When Ladybug was a young tot {around 9-12 months} the theme was a simple as “bells” and we just played with bells all week! This post is more for the planning that happens when tots are a bit older, around 2 years old and up.
Step Two ~ Create a Pinterest Board for that theme
Step Three ~ Start pinning ideas! Pin anything you find that you might use, knowing that you will NOT use it all. I do Google searches, Pinterest searches and specific blog/website searches. I have many theme boards on my Pinterest site, you can use those as a starting point! If you scroll a bit down on my boards you will see that my theme section is organized alphabetically.
Step Four ~ Gather books, toys, printables that you already have {I put them all in a prep bin}.
Step Five ~ Think about what YOUR child enjoys and narrow down your ideas. Even if you pinned tons of craft ideas, keep in mind the likes/dislikes of your child, If your child hates crafts, just choose one. If you child loves crafts and you do too, choose one for each day! Balance out YOUR likes as well, if it stresses you out tremendously, don’t do it {or do it only once}. Example ~ I detest painting but Ladybug LOVES it. I balance her love with my dislike and we will usually do painting all in one sitting, only once or twice a week. Even though she would prefer every day, my stress level can’t handle that!
Step Six ~ Start Printing! Print only what you plan to use, with maybe a few extras. I print anything consumable on fast draft, and anything to be laminated or used again on fast normal. Sort your printed stacks into one pile of papers that need more prep work {cutting, laminating, etc.} and one that is ready to go {coloring sheets, dot fun sheets, etc.}
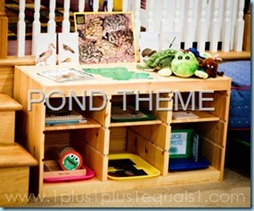
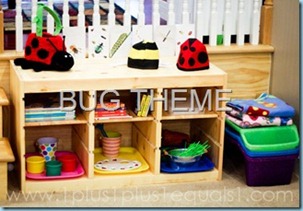
Step Seven ~ Final Prep! Get it all prepared and put it in one place. If you are a detailed planner {I used to be} make your plan for the week{s}. If you are like me, just dump it all in a big bin and then select new activities each night before you go to bed and have them ready for the next day! I usually try to set up a fun display of the theme in the schoolroom the night before it begins to get my kids excited to learn! It works and they always head straight to the theme display when they first see it!
Step Eight ~ Have Fun! Enjoy the theme you have planned. We usually leave a theme for a week, but if something comes up or if it is still being enjoyed, we will go for 2 weeks. I find that my kids usually burn out from the theme within 2 weeks. I also don’t stress about not getting to everything I had ready to go. Remember, you don’t have to do it all!
Step Nine ~ All Done! Let’s Clean it Up! I do NOT keep it all, I take a photo of the set of completed work and then toss most of it. 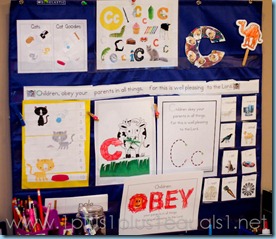
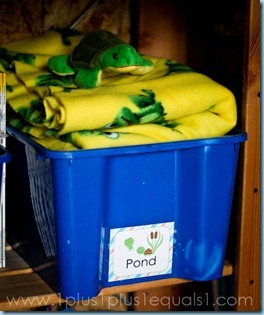
If it can be used again, it gets stored by theme using the theme printable storage method I shared awhile back. If it was super special, I might keep it, but honestly I toss 90% of it after the photo. I put everything back where I got it from, all in one night. Sometimes the kids help me, but mostly I like doing it alone.
A few other helpful posts that share a bit more about aspects of this topic:
- All of Our Theme Based Tot, Preschool & Kindergarten Packs
- How to Plan Using Themes for Tots & Preschoolers
- Storing Theme Printables
- Storing Theme Books
- Homeschool Storage Room part 1
- Homeschool Storage Room part 2
- Storing Sensory Bin Items
This post is #4 in my series, “Homeschooling Tots & Preschoolers,” for the iHomeschool Network Spring 2013 Hopscotch. Visit other bloggers participating here!
Day 1 ~ Where to Begin with Tot School eBook
Day 2 ~ You Don’t Have to Do it All!
Day 3 ~ Developmentally Appropriate Practice
Day 4 ~ Time Invested in Tot Schooling
Day 5 ~ 10 Tips for Studying Nature with Tots
Day 6 ~ Exposure vs. Mastery
Day 7 ~ Why Themes?
Day 8 ~ Teaching Tots in a Large Family
Day 9 ~ Our Favorite Learning Tools for Tots
Day 10 ~ Early Childhood Theme Printables A-E

